You can setup Gmail to send email from a different email address, i.e. [email protected]. This way you can manage all your email in 1 central location – your Gmail inbox. Here are the steps to set that up.
Related: 3 options for your own professional [email protected] email address
1. Create an account for your alternate email address
The first step is to create an email account on your web host. Please consult your web host’s documentation for this. Here are direct links to some popular web hosts:
- SiteGround
- Site5
- Bluehost
- HostGator (also for Liquid Web, MidPhase, InMotion Hosting)
- GoDaddy
- Media Temple
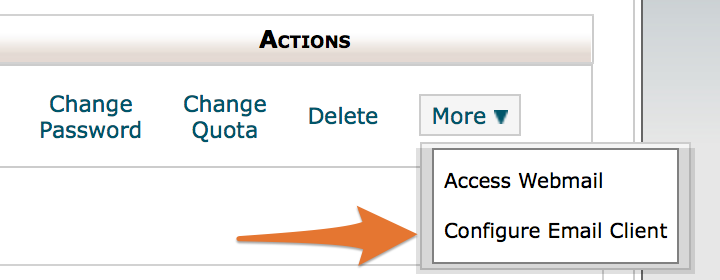
Take note of your email account password and have your email account settings on hand. In cPanel, you can find these details by clicking the Configure Email Client link, under the Manual Settings section.

2. Forward your alternate email address to Gmail
When you link Gmail with your email account, Gmail will only check it every 15 minutes. We’ll add a forwarder to redirect emails to your Gmail account immediately.

Consult your web host’s documentation to create a forwarder for your alternate email address to Gmail.
3. Configure Gmail to use this address

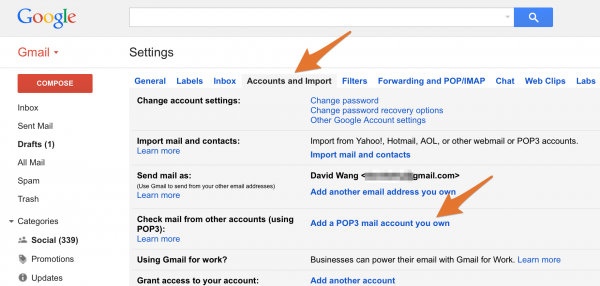
Navigate to your Gmail Settings → Accounts. Click on the link to add another email address you own.
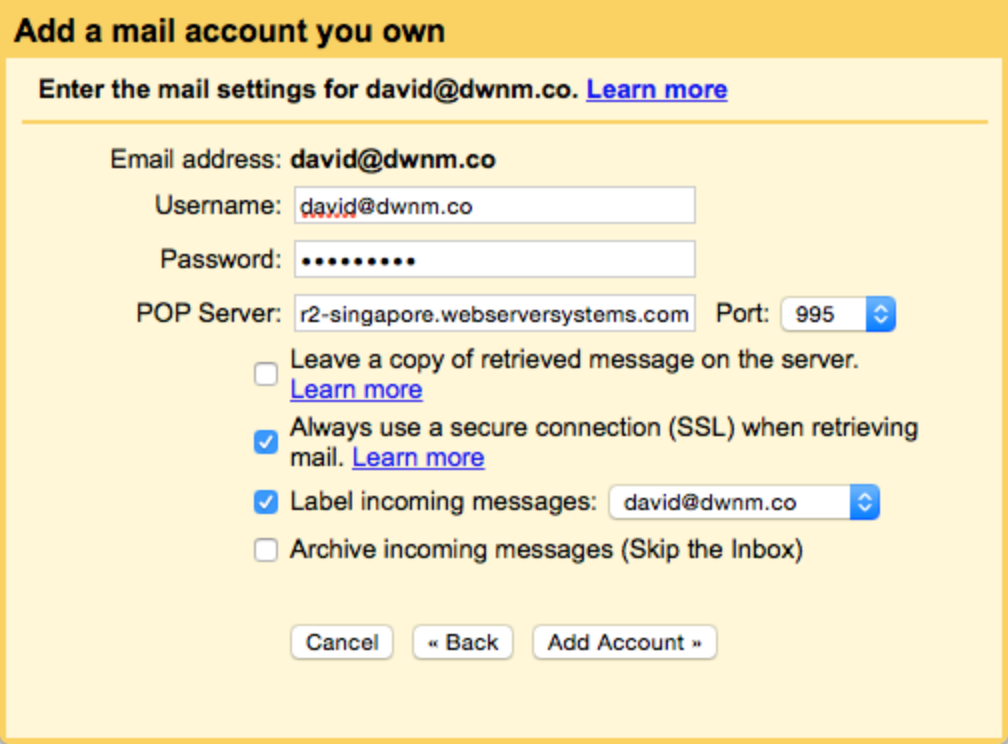
A new window will open. Type in the alternate email address and click Next Step to proceed. Fill in the email account settings from Step 1 in the window below. Use the SSL settings if available.

Make sure to uncheck the option to leave a copy of the message on the server. This way, Gmail will empty your mailbox every time it retrieves your email.
Click Add Account. Gmail will now ask if you also want to send email from that address. Select Yes and proceed to the next step.
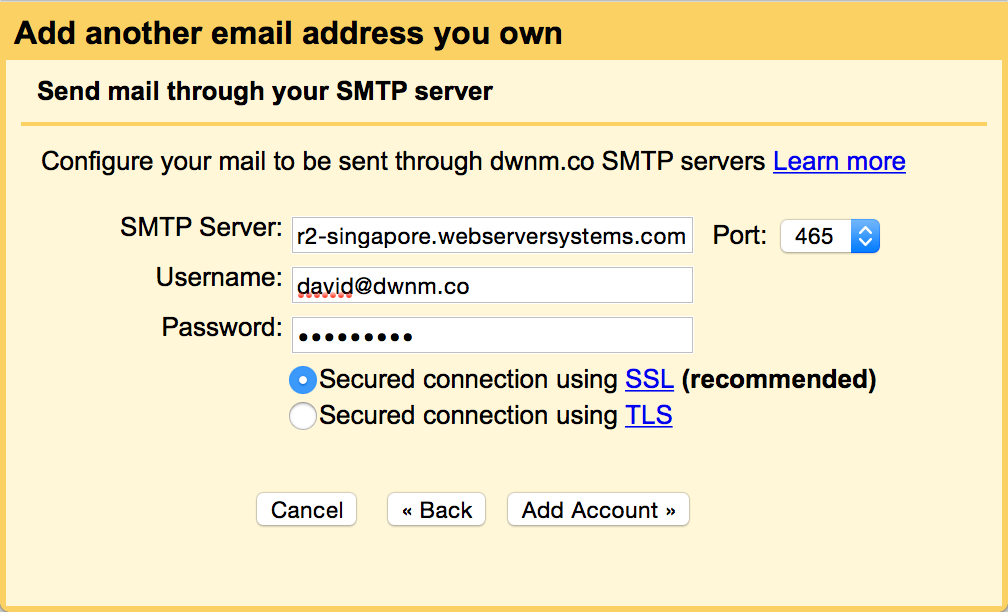
Type in your display name and uncheck “Treat as an alias”. Proceed to the next step. Then fill in your SMTP (outgoing) server settings, also with the values from Step 1.

Click Add Account. Gmail will now ask you to verify your email address by sending you a verification email.
The verification email will be sent to your alternate email address. Because of the forwarder in step 2, this verification email will appear in your Gmail inbox. Open the email and click the link to verify your email address.
Congratulations! You’ve completed setting up Gmail to send and receive emails from your alternate address.
4. Use your new alternate address
Now when composing a new email, click the down arrow next to the From email address to choose which address to send from.

Once you have completed the verification, you have several new options in your Gmail Settings → Accounts page. You can now make the alternate email address the default, and choose which address to reply from.