
WordPress displays a helpful welcome message when you first login after installing a new WordPress site, but it’s a little too brief to be helpful to new users. We’re constantly teaching our friends about WordPress so we’ve put together a quickstart guide for new users with this article below!
Logging into WordPress
Let’s start right from the beginning – how do you login to WordPress? You can get to the Admin for any WordPress site by going to
sitename.com/wp-admin/
However, if WordPress isn’t installed in the root directory, you’ll need to adjust the path, e.g.
sitename.com/blog/wp-admin/
Tip: Bookmark the URL to save you from typing it every time you want to login to WordPress.
Customize site settings
Next stop is to customize your site settings by going to Admin → Settings → General. Here is what the settings do:
Site Title & Tagline – These describe your site and are displayed in the header and page title of your website or blog for many themes. It’s important to use a descriptive Site Title and Tagline because it’s what visitors will find you with.
WordPress and Site Address – Don’t change this or you may get locked out of your site!
Email Address – This is the address that WordPress uses to send notifications from. For example, new comment notifications are sent from this address. Set it to something generic like [email protected].
Membership and New User Default Role – You can allow visitors to sign up for your website as Subscribers or any other role from the dropdown. This does pose a security risk so it’s best to leave it off unless you need it.
Date and Time – Choose a city in the same timezone as you. This is important for determining the correct time when you publish content on your website, and for scheduling posts to be published in the future.
Setup your permalinks
Permalinks are the URLs for each individual page on your site. By default, WordPress gives each post a permalink that looks like:
clickwp.com?p=591
Symbols and numbers in the URL aren’t very intuitive so we’ve customized our permalink structure to look like this:
clickwp.com/blog/wordpress-first-steps/
You can setup your permalink structure in the WordPress Admin → Settings → Permalinks.
Customize your site design
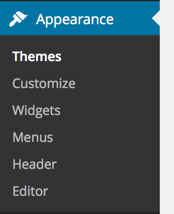 Out of the box, your site uses a default theme (Twenty something). This theme comes with theme options, widgets, navigation menus, custom backgrounds and custom headers. Explore the settings pages under Admin → Appearance for your theme to personalize your site. FYI not all themes have the same features, so that’s why you may not see Backgrounds or Headers in the Appearance Menu for some themes.
You can also install and activate new themes directly from the Admin. Go to Admin → Appearance and click on the Install Themes tab to search and browse for themes from the WordPress Free Themes Directory.
Related KB article: Customize the Appearance of your WordPress site
Fill out your profile
Now click on your username in the top right of the site. This will bring you to your profile page where you can change preferences, personalize your user profile and change your password.
Tip: Take the time to fill out the Biographical Info box. Some themes will display your bio underneath your posts. Scroll down to see an example.
Get a Gravatar
We’ll now leave your site and continue our first steps at Gravatar.com. What’s a Gravatar? The site explains:
Your Gravatar is an image that follows you from site to site appearing beside your name when you do things like comment or post on a blog. Avatars help identify your posts on blogs and web forums, so why not on any site?
![]()
Gravatars are a great way to display a consistent identity or brand image throughout your website and other sites that you may comment and participate on. It’s also completely free! Just follow the instructions on the site to set it up.
Gravatars are linked to your email address, so be sure to use the same email address as in your profile from above. Once you’ve set up your Gravatar, it will appear with your author bio and comments. Yes, it even works when you comment on other sites.
Best thing about Gravatar? Update it at Gravatar.com, and all your gravatar images are updated on your site and all other sites that use the service too. Cool!
Related KB article: Setup your Gravatar
Sign up for Akismet
The next thing we like to recommend WordPress users to sign up for is Akismet, a spam filtering service for your website. Unfortunately spam is an unavoidable part of modern life. As a website owner you’ll get spam on any forms that you have on your website including contact and comment forms.
After signing up for Akismet, you’ll need to activate the Akismet plugin for your site. This allows Akismet to scan each comment your site receives and determine if it’s spam or ham. Taking this single step will greatly reduce or eliminate spam comments on your WordPress site completely, so we highly recommend doing so.
Please note that although Akismet is a paid service, they do offer a free, personal option for bloggers. And because Akismet is made by the same guys who oversee the WordPress project, the Akismet plugin is included in every WordPress installation.
Related KB article: Activate Akismet for your WordPress site
Understand the risks
We know you’re excited to tell the world about your new site but hold on! We want to have a serious talk with you about something that doesn’t get covered enough.
It’s a great feeling to have a website where you can install plugins and themes, display advertising and write about anything you want. You can do anything, it’s your site!
You can do anything – you can also totally mess up your site.
This is especially true for those of you who have migrated over from Blogger, Tumblr or WordPress.com – there is no more system in place to prevent you from accidentally making a terrible mistake. Make sure to read the instructions of plugins and themes carefully before you install them.
The internet is also a dangerous place with hackers and criminals on the prowl. They would love to hijack your pride-and-joy to distribute malware or use it in phishing scams. You can protect yourself by making sure that WordPress and all plugins and themes are kept up to date.
Be sure to also consider implementing a WordPress backup solution so that if the worst does happen, you’re not left out in the cold. There are lots of plugins that can help you with this so please take the time to research your options, or contact us for help.
Now you’re off to the races!
Congratulations! If you followed the steps above after installing WordPress you’ll be ahead of most new users and you’ll be heading down the road to success. Enjoy your new site and have fun!
We’re thinking of publishing a Part 2 to this article. Was there anything that we left out? Please tell us in the comments. Did you enjoy the article? Please share it with your friends!
Thanks for reading 🙂
P.S. Feeling lost? Check out the guides in our resource library.


Maybee somthing about security, which good plugins to install etc.
Regards
Claus
Thanks for the suggestion Claus! We’ll work on those when we have time.
Security is a big thing, use strong or 2 way verification plugin. Akismat is also a good plugin for defending from spam comments.
I do use this one, thanks for another info about Akismat. Keep up the good work guys, thanks.:)